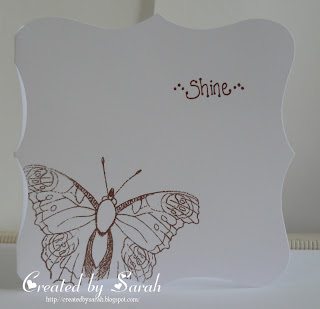
So it's embossing this week at Less is More on a one layer card (OLC). Now I actually really like embossing, dry or heat, I love my Bug and what it can do with embossing folders. However what I don't like is that I can't emboss directly onto a card base on the size of card I prefer to use, 6x6 square. So I have been rather frustrated with the attempts to do what I had in my mind with this weeks challenge.
Does anyone know how to get a standard Cuttlebug embossing folder to emboss half a card (6x6) without leaving an edge from the folder? I would be so grateful if anyone could give some advice.
I still managed to produce a few cards none of them stunning like the ones I have already looked at on the blog, but still serviceable cards that will go to someone eventually.
They are all a combination of dry and heat embossing, with varying degrees of success. I am out of practice with heat embossing (haven't done any for ages) so had a few little mishaps - didn't get all the powder to heat and sometimes the card warped.
Heigh ho, I've tried and that's what matters. Still wish though that I could do what you others ladies do, and produce a card that just makes you go Wow! Maybe next week I will do quality rather than quantity ;-)
Cards now:
Something I learned with this card, don't stamp all the butterflies and then try to cover them in different colour embossing powder! Do each in turn!
These are the ones where I was trying to emboss directly onto the card blank with my folders - I think you can see where it hasn't worked.
The big butterfly stamp is the base from the Papermania 'Build a Butterfly' stamp, I think the medium sized one might be PSX stamp (but I'm not sure) the small ones are from my Martha Stewart stamp and punch butterfly punch.
Various sentiment stamps, embossing powders and Cuttlebug embossing folders. I used a very old brass stencil for the final card. Boy was I into dry embossing about 5 years ago, every card I produced had some element of embossing on it! How times change!
Sarah


14 comments:
These are lovely Sarah, the large butterfly stamp is fab. (the trick to avoid lines is to make a 'shim' to replace the top B plate - make it the same thickness as the B plate but just slightly smaller than the E.Folder so it doesn't press on the edges). xx
Wow Sarah, you have been busy. These are lovely cards. Jo
They are all gorgeous Sarah...you busy bee!
hugs Vicky xx
oh these are all simply stunning cards ~love them!
vanessa xx
My, you have been busy Sarah.
Some really lovely cards, I think that one of the butterflies and the last one are my faves!
Thanks so much
Chrissie
Lady LIM
"Less is More"
Lovely cards Sarah. The embossed frame on the last one looks really effective :o) Lisa x
Wonderful set of cards all so different and everyone lovely. XOXO Zoe
Well done Sarah you have been busy
All are pretty, love the first and last one
Thank you very much
Diva LIM mandi
"Less is More"
These areall just gorgeous Sarah! I know what you mean about the embossing folders...Why don't they just make different sized ones the same sizes as card blanks?! I think I will try Suze's tip! :)
Lizy x
Hi there Sarah, well you've got a wonderful range of cards here, I think they're lovely:0) I certainly haven't embossed with heat for a while so am a bit rusty too! I think your butterflies look great,. I can't see any line from the folder but Suze's tip sounds great. Have fun :0) xxx
Hi Sarah. You certainly got a wow from me when I saw the last card - and the others are gorgeous too! You probably know about this already but when I want to emboss images in different colours I stamp first into a versamark pad and then in the colour of my choice, stamp onto the card stock and heat emboss with clear embossing powder. People ask if it ruins my ink pads but I've been doing this for a few years and my pads are fine (I use SU classic ink pads). Hope this helps! Vx
Wow, your cards are lovely. You've certainly been busy.
Beautiful cards
Wow! A lot of gorgeous cards!! You've really been busy! To emboss a card larger than your embossing folder, try rolling it through yor big shot/cuttlebug -- but don't go all the way through. Back it out then move the folder to the other side and roll through the Sam way...not all the way to the edge od the EF... Then back it out, I've done that before and it works pretty good.
Post a Comment